Hands-on: Integrating React Hook Form with React data grid
 Hands-on / August 17, 2023

Welcome to our Hands-on series! Here, we prioritize practicality, with a strong focus on Handsontable demos and useful code snippets. Why? To help you save time and seamlessly begin your projects using our data grid. Let’s dive into some hands-on action! 💪
Introduction
This article will guide you through the process of integrating React Hook Form with Handsontable, enabling you to design forms for adding and editing records within a data grid. React Hook Form is a library for handling form validation and state management in React apps, making form handling easy with its simple API.
What are we building?
In this project, we’ll create an HTML form using React Hook Form and feed the data into the Handsontable data grid. The driving factor behind this endeavor is a specific business requirement: the need to transform user-submitted form data into a structured tabular layout. For example, think of a scenario where the form captures various details about employees.
Demo
Resources used in the project
First of all, let’s see what resources we are going to use in this project:
- Create-React-App: For handling everything related to the initial setup of a React project.
- React Hook Form: A handy library for creating forms in React which is lightweight, performant, and provides inbuilt validations.
- Handsontable: Handsontable is used to create data grids that give the look and feel of a spreadsheet.
- TailwindCSS: We’ll use TailwindCSS to improve the style of our forms. You may use any CSS framework of your choice.
Additionally, we’ll also use form-builder to create forms without the need for manual coding. It’s a utility created by the React Hook Form team to generate form code instead of starting from the ground up. While entirely optional, it comes highly recommended due to its time-saving benefits.
Setting up the project
Installations
Set up the project using create-react-app and install the required libraries. Run the below commands:
npx create-react-app datatable-form
cd datatable-form
npm install react-hook-form@7.45.2 handsontable@13.0.0 @handsontable/react@13.0.0
npm install -D tailwindcss@3.3.3
npx tailwindcss init
We assume that you have Node.js >= 14 installed with an npm version (5.2+) supporting npx.
In the next step, we’ll need to add template file paths in tailwind.config.js:
/** @type {import('tailwindcss').Config} */
module.exports = {
  content: [
    "./src/**/*.{js,jsx,ts,tsx}",
  ],
  theme: {
    extend: {},
  },
  plugins: [],
}
The last step includes adding tailwind directives to the ./src/index.css file:
@tailwind base;
@tailwind components;
@tailwind utilities;
Creating the form
As mentioned, we’ll use the create-hook-form library to handle HTML forms. But before that, we need to create those forms. Although we can write the code for form creation, it’s better to utilize the form-builder utility to generate code.
When you open the builder, you’ll get the screen like this:
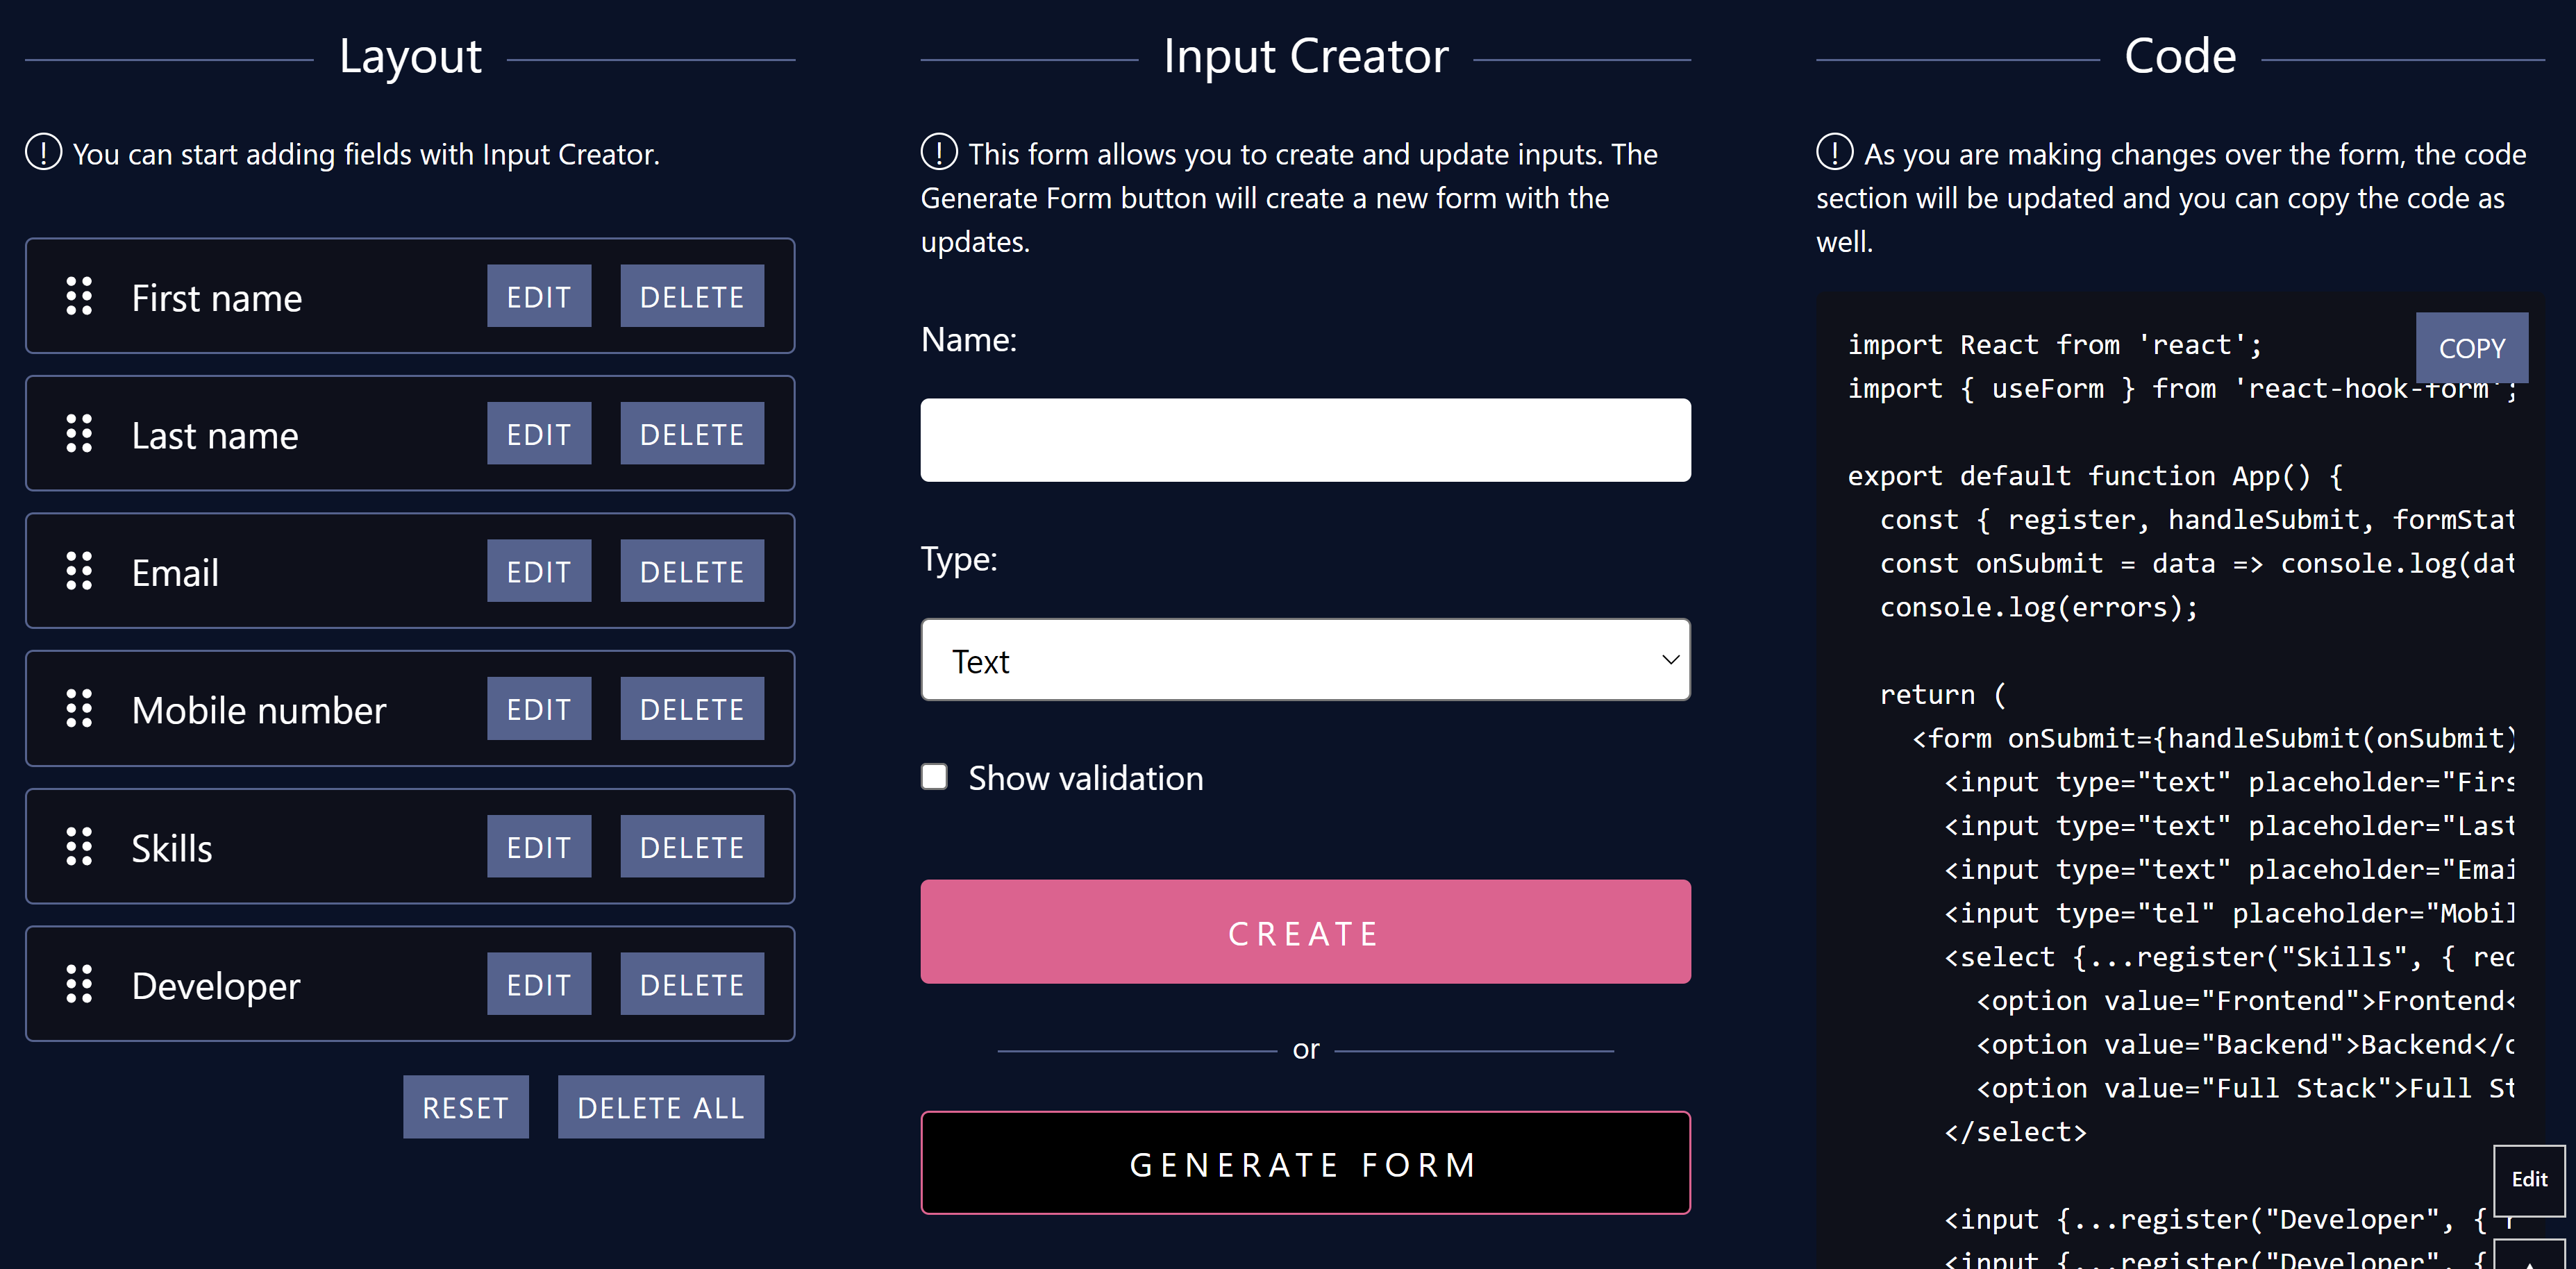
For this project, we’ve created a form with the following fields:
- First name – Text field,
maxLength80
- Last name – Text field,
maxLength100
- Email – Text field, pattern `^\S+@\S+$`
- Mobile number – Number,
minLength6,maxLength12
- Skills – Select a field with options (Frontend, Backend, Full Stack)
- Developer – Radio field with options (yes, no)
Check the Code section and see if the generated code represents your form.
Now open the App.js file and paste the generated code there:
import React from 'react';
import { useForm } from 'react-hook-form';
export default function App() {
const { register, handleSubmit, formState: { errors } } = useForm();
const onSubmit = data => console.log(data);
console.log(errors);
return (
<form onSubmit={handleSubmit(onSubmit)}>
<input type="text" placeholder="First name" {...register("First name", {required: true, maxLength: 80})} />
<input type="text" placeholder="Last name" {...register("Last name", {required: true, maxLength: 100})} />
<input type="text" placeholder="Email" {...register("Email", {required: true, pattern: /^\S+@\S+$/i})} />
<input type="tel" placeholder="Mobile number" {...register("Mobile number", {required: true, minLength: 6, maxLength: 12})} />
<select {...register("Skills", { required: true })}>
<option value="Frontend">Frontend</option>
<option value="Backend">Backend</option>
<option value="Full Stack">Full Stack</option>
</select>
<input {...register("Developer", { required: true })} type="radio" value="Yes" />
<input {...register("Developer", { required: true })} type="radio" value="No" />
<input type="submit" />
</form>
);
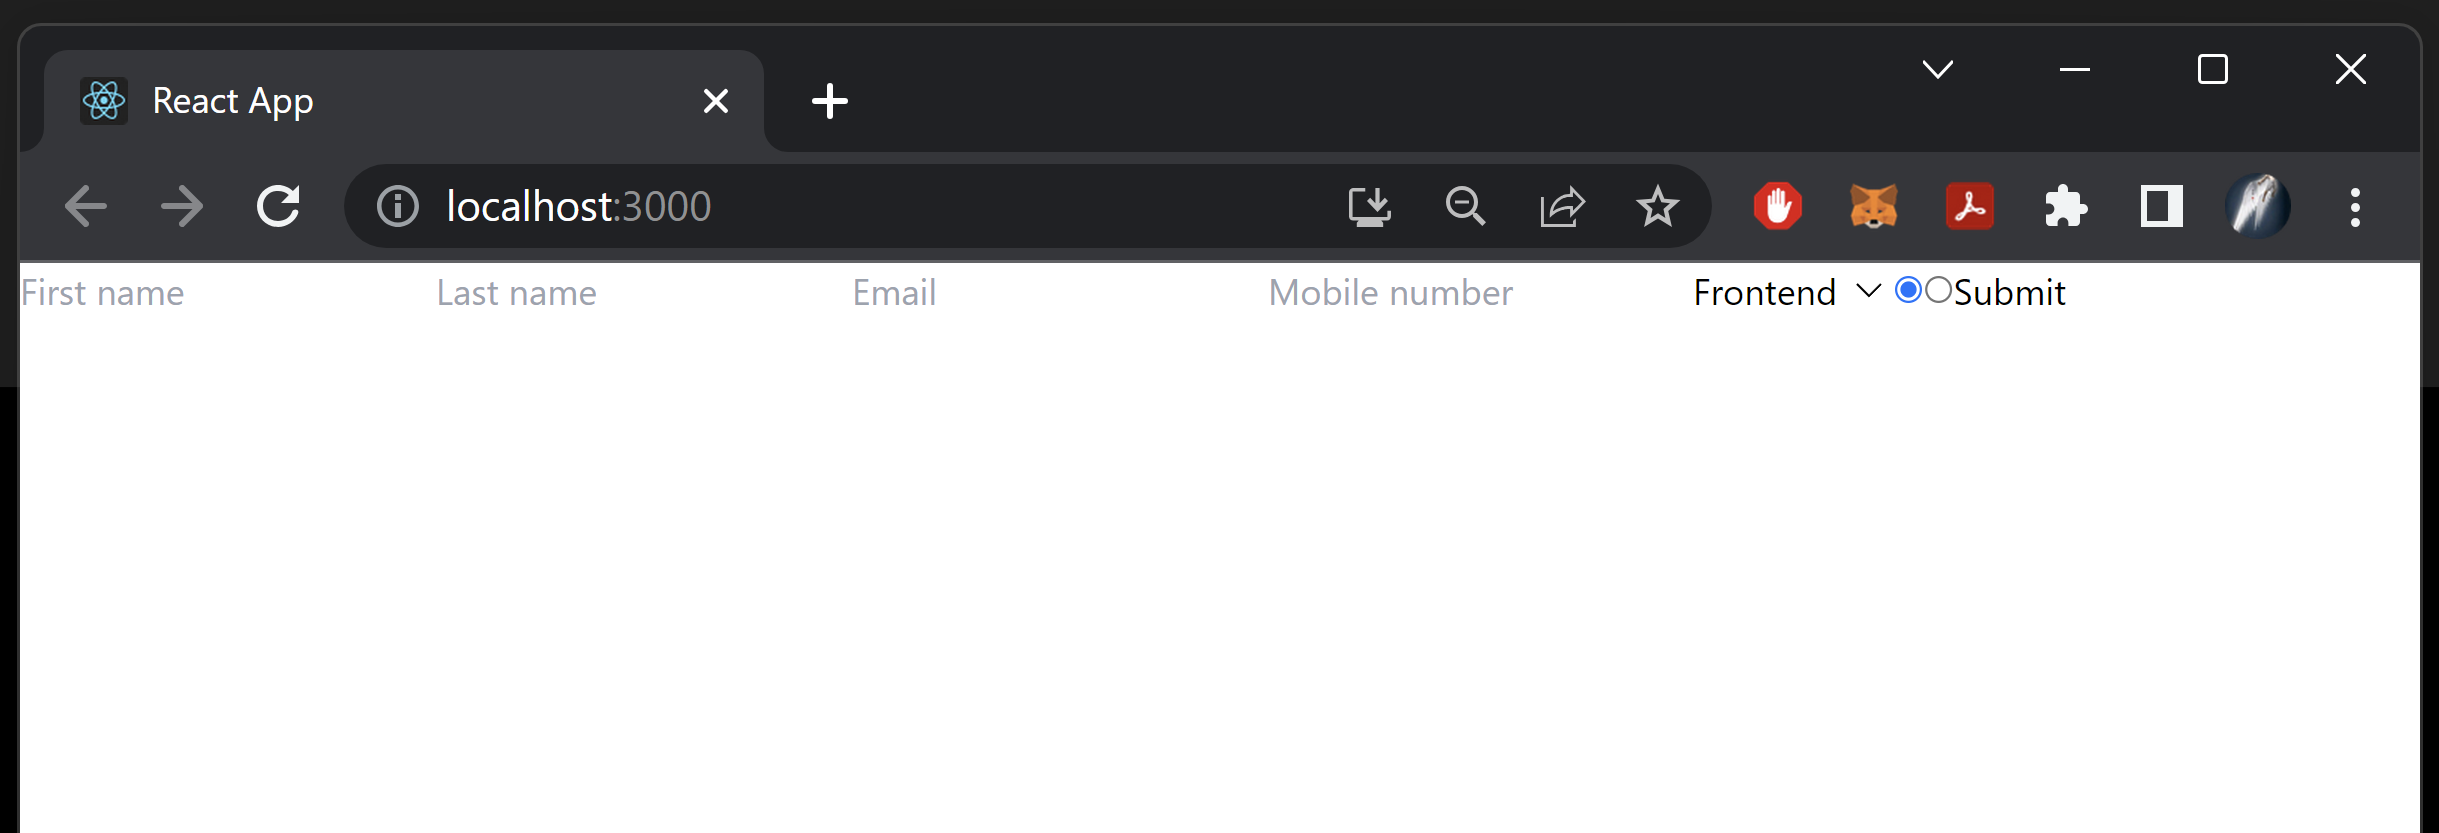
}Time to test if things are working till this point. So, run the app using the below command:
npm run start
The browser will open and display the form like this:
The form is currently visible; however, its visual presentation leaves room for improvement. To enhance its appearance, we’ll apply styling using TailwindCSS:
import React from 'react';
import { useForm } from 'react-hook-form';

const FIRST_NAME_TITLE = 'First Name'
const LAST_NAME_TITLE = 'Last Name'
const EMAIL_TITLE = 'Email'
const MOBILE_NUMBER_TITLE = 'Mobile Number'
const SKILLS_TITLE = 'Skills'
const SKILLS_OPTION_FRONTEND_VALUE = 'Frontend'
const SKILLS_OPTION_BACKEND_VALUE = 'Backend'
const SKILLS_OPTION_FULLSTACK_VALUE = 'Full Stack'
const DEVELOPER_TITLE = 'Developer'
const DEVELOPER_OPTION_YES_VALUE = 'Yes'
const DEVELOPER_OPTION_NO_VALUE = 'No'
const SUBMIT_BUTTON_TITLE = 'Submit'

export default function App() {
  const { register, handleSubmit, formState: { errors } } = useForm();
  const onSubmit = data => console.log(data);
  console.log(errors);

  return (
    <div className="container mx-auto p-10">
      <h1 className="text-2xl font-bold my-4">React Hook Form + React Data Grid with Handsontable</h1>
      <form onSubmit={handleSubmit(onSubmit)}>

        <div className="flex items-center my-2">
          <label className="mr-2">{FIRST_NAME_TITLE}</label>
          <input
            className="border border-gray-300 rounded p-2"
            type="text"
            placeholder={FIRST_NAME_TITLE}
            {...register(FIRST_NAME_TITLE, {
              required: true,
              maxLength: 80
            })} />
        </div>

        <div className="flex items-center my-2">
          <label className="mr-2">{LAST_NAME_TITLE}</label>
          <input
            className="border border-gray-300 rounded p-2"
            type="text"
            placeholder={LAST_NAME_TITLE}
            {...register(LAST_NAME_TITLE, {
              required: true,
              maxLength: 100
            })} />
        </div>

        <div className="flex items-center my-2">
          <label className="mr-2">{EMAIL_TITLE}</label>
          <input
            className="border border-gray-300 rounded p-2"
            type="text"
            placeholder={EMAIL_TITLE}
            {...register(EMAIL_TITLE, {
              required: true,
              pattern: /^\S+@\S+$/i
            })} />
        </div>

        <div className="flex items-center my-2">
          <label className="mr-2">{MOBILE_NUMBER_TITLE}</label>
          <input
            className="border border-gray-300 rounded p-2"
            type="tel"
            placeholder={MOBILE_NUMBER_TITLE}
            {...register(MOBILE_NUMBER_TITLE, {
              required: true,
              minLength: 6,
              maxLength: 12
            })} />
        </div>

        <div className="flex items-center my-2">
          <label className="mr-2">{SKILLS_TITLE}</label>
          <select
            className="border border-gray-300 rounded p-2"
            {...register(SKILLS_TITLE, { required: true })}
          >
            <option value={SKILLS_OPTION_FRONTEND_VALUE}>
              {SKILLS_OPTION_FRONTEND_VALUE}
            </option>
            <option value={SKILLS_OPTION_BACKEND_VALUE}>
              {SKILLS_OPTION_BACKEND_VALUE}
            </option>
            <option value={SKILLS_OPTION_FULLSTACK_VALUE}>
              {SKILLS_OPTION_FULLSTACK_VALUE}
            </option>
          </select>
        </div>

        <div className="flex items-center my-2">
          <label className="mr-2">{DEVELOPER_TITLE}</label>
          <label className="mr-2">
            <input
              {...register(DEVELOPER_TITLE, { required: true })}
              type="radio"
              value={DEVELOPER_OPTION_YES_VALUE} />
              {` ${DEVELOPER_OPTION_YES_VALUE}`}
          </label>
          <label className="mr-2">
            <input
              {...register(DEVELOPER_TITLE, { required: true })}
              type="radio"
              value={DEVELOPER_OPTION_NO_VALUE} />
              {` ${DEVELOPER_OPTION_NO_VALUE}`}
          </label>
        </div>

        <button className="bg-blue-500 hover:bg-blue-700 text-white font-bold py-2 px-4 rounded my-2" type="submit">
          {SUBMIT_BUTTON_TITLE}
        </button>
      </form>
    </div>
  );
}
You may notice that we have introduced some constants to hold the values of strings. It’s a good practice to separate strings from the code.
Now run the project and check the output:
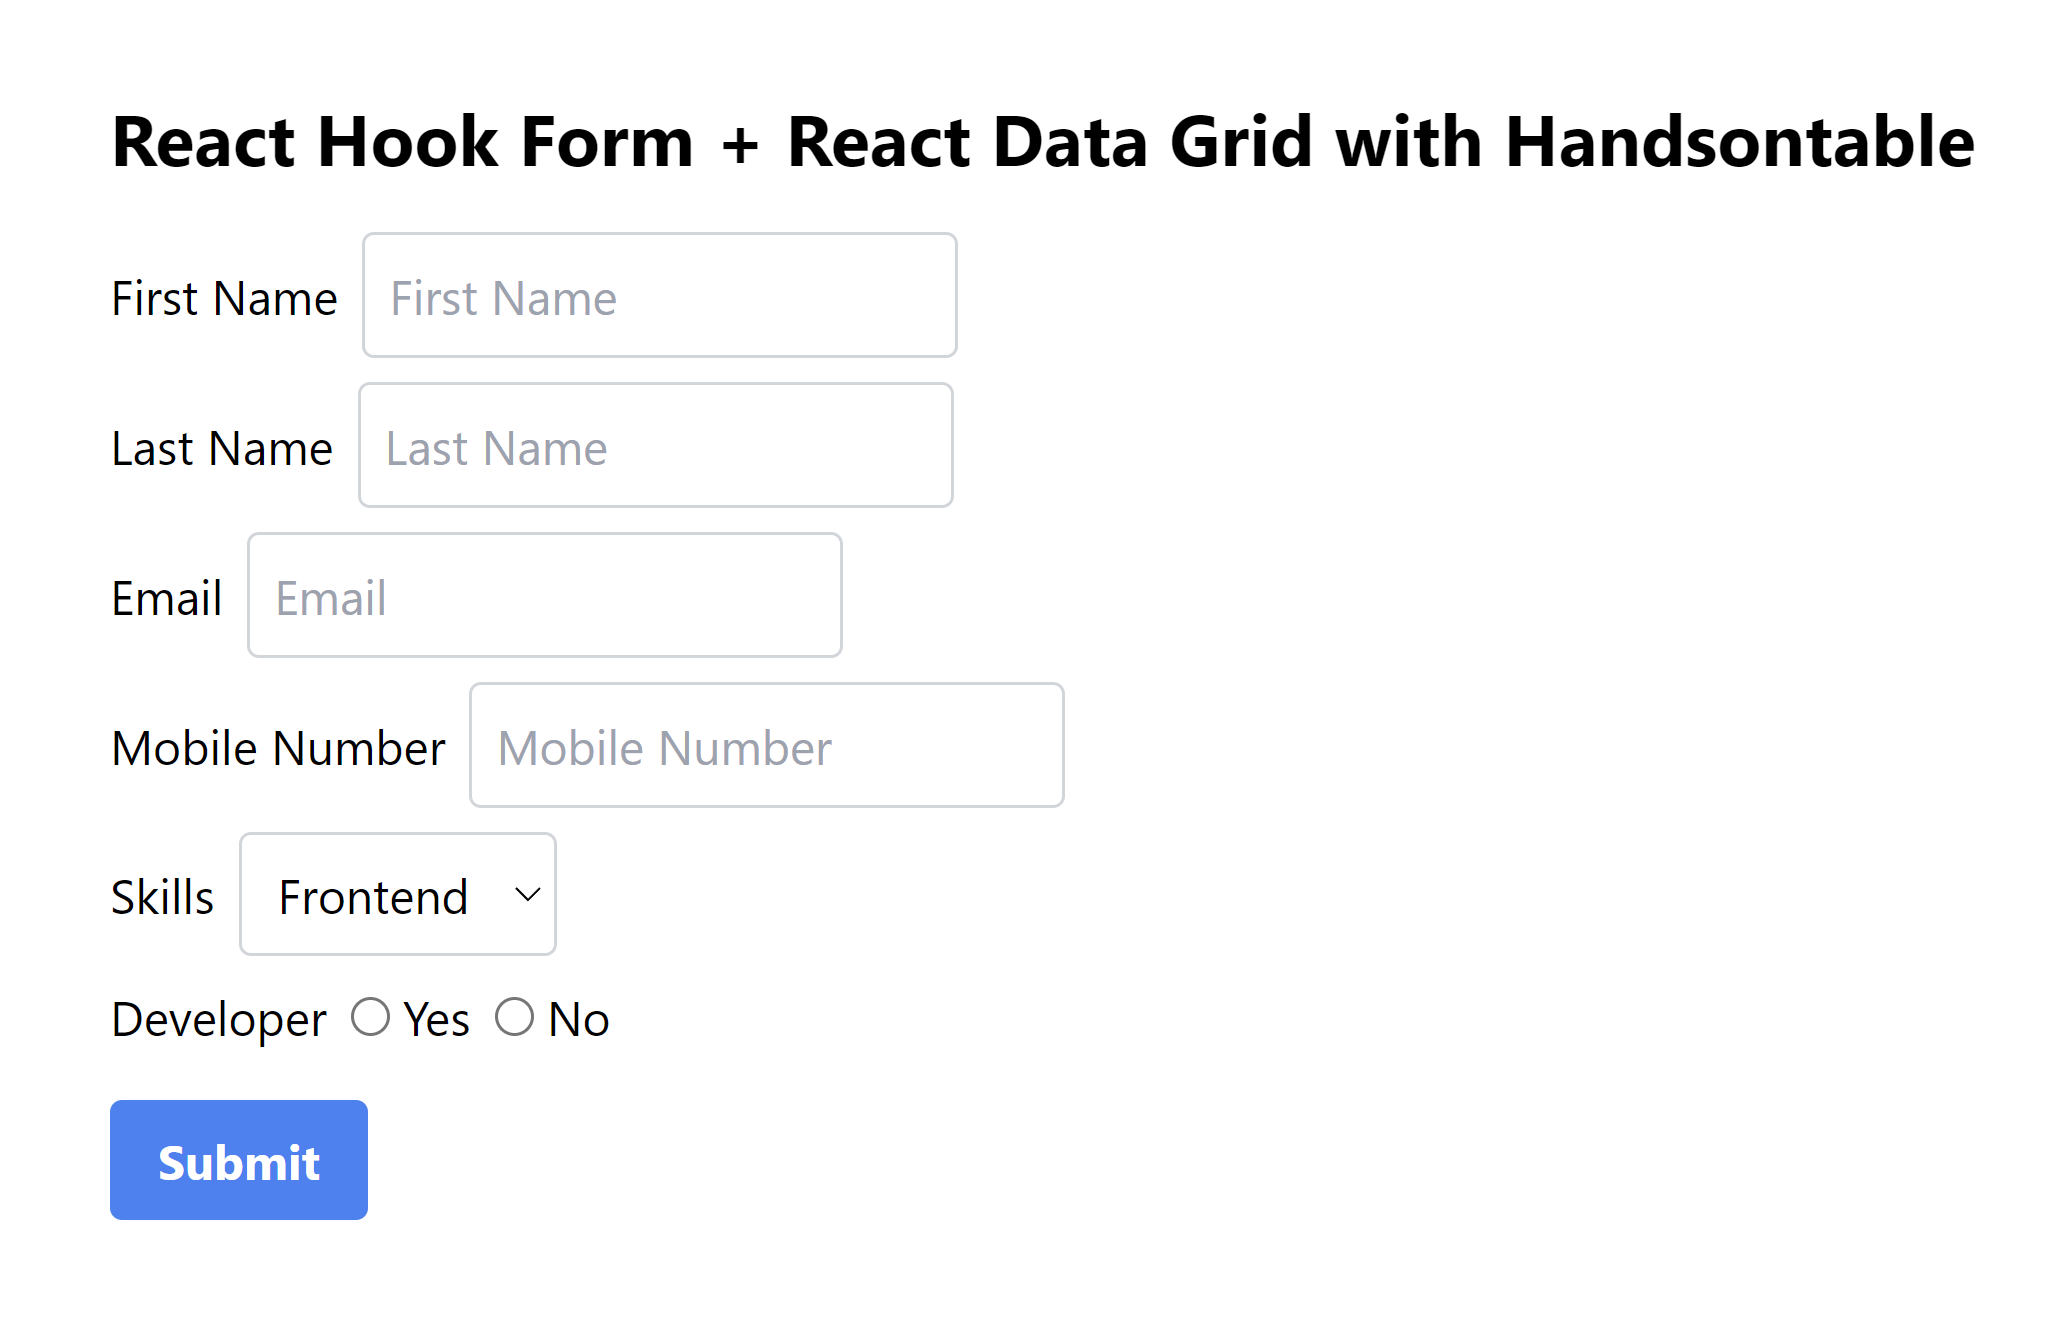
The form looks much better now.
Integrating Handsontable with React Hook Form
The final step in this project is to create a data grid table using Handsontable and integrate it with React Hook Form. To accomplish this, we need to follow a few steps:
- Initialize the table on the mount of the component so that an empty data grid can be displayed with headers.
- Add an extra column in the data grid table for the row editing action button.
- Attach a click hook to the Edit button.
- Populate the data grid with the form’s values.
- Use the Handsontable CSS file to style the data grid.
- Reset the form after submitting it.
Here is the code:
App.js
import React, { useEffect, useState } from 'react';
import { useForm } from 'react-hook-form';
import { HotTable } from "@handsontable/react";
import { registerAllModules } from 'handsontable/registry';
import "handsontable/dist/handsontable.full.css";
import './App.css';

// register Handsontable's modules
registerAllModules();

const FIRST_NAME_TITLE = 'First Name'
const LAST_NAME_TITLE = 'Last Name'
const EMAIL_TITLE = 'Email'
const MOBILE_NUMBER_TITLE = 'Mobile Number'
const SKILLS_TITLE = 'Skills'
const SKILLS_OPTION_FRONTEND_VALUE = 'Frontend'
const SKILLS_OPTION_BACKEND_VALUE = 'Backend'
const SKILLS_OPTION_FULLSTACK_VALUE = 'Full Stack'
const DEVELOPER_TITLE = 'Developer'
const DEVELOPER_OPTION_YES_VALUE = 'Yes'
const DEVELOPER_OPTION_NO_VALUE = 'No'
const SUBMIT_BUTTON_TITLE = 'Submit'
const ACTION_TITLE = 'Action'
const EDIT_BUTTON_TITLE = 'Edit'

export default function App() {
  // Initialize the useForm hook from react-hook-form
  const { register, handleSubmit, reset, setValue, formState: { errors } } = useForm();

  // Refs for the Handsontable instance
  const hotRef = React.useRef(null);
  const [tableData, setTableData] = useState([]);

  // Track the selected row
  const [selectedRow, setSelectedRow] = useState(null);

  useEffect(() => {
    setTimeout(() => {
      hotRef.current.hotInstance.render();
    }, 100);
  }, []);

  useEffect(() => {
    if(selectedRow)
      hotRef.current.hotInstance.selectRows(selectedRow[0][0])
    else
      hotRef.current.hotInstance.deselectCell()
  }, [selectedRow])

  const editButtonOnClick = (row) => {
    setSelectedRow([...hotRef.current.hotInstance.getSelected()]);
    const dataAtRow = hotRef.current.hotInstance.getDataAtRow(row);

    // Set the form fields with the data from the row
    setValue(FIRST_NAME_TITLE, dataAtRow[0]);
    setValue(LAST_NAME_TITLE, dataAtRow[1]);
    setValue(EMAIL_TITLE, dataAtRow[2]);
    setValue(MOBILE_NUMBER_TITLE, dataAtRow[3]);
    setValue(SKILLS_TITLE, dataAtRow[4]);
    setValue(DEVELOPER_TITLE, dataAtRow[5]);
  };

  const editButton = (td, row) => {
    const button = document.createElement("button");
    button.innerText = EDIT_BUTTON_TITLE;
    button.classList =
      'bg-blue-500 hover:bg-blue-700 text-white font-bold py-0 px-4 rounded';
    button.onclick = () => editButtonOnClick(row);

    td.innerHTML = '' // Clear the cell content
    td.appendChild(button); // Append the button to the cell
    return td;
  }

  const hotSettings = {
    data: tableData,
    colHeaders: [
      FIRST_NAME_TITLE,
      LAST_NAME_TITLE,
      EMAIL_TITLE,
      MOBILE_NUMBER_TITLE,
      SKILLS_TITLE,
      DEVELOPER_TITLE,
      ACTION_TITLE
    ], // Headers for the Handsontable columns
    columns: [
      { data: FIRST_NAME_TITLE, type: "text" },
      { data: LAST_NAME_TITLE, type: "text" },
      { data: EMAIL_TITLE, type: "text" },
      { data: MOBILE_NUMBER_TITLE, type: "text" },
      { data: SKILLS_TITLE, type: "text" },
      { data: DEVELOPER_TITLE, type: "text" },
      {
        data: null,
        renderer: (instance, td, row, col, prop, value, cellProperties) => {
          // Render a button in the cell
          return editButton(td, row);
        },
      },
    ],
    rowHeaders: true,
    stretchH: "all",
  };

  // Form submit handler to save the edited data back to Handsontable
  const onSubmit = data => {
    if (selectedRow !== null) {
      setTableData(prevTableData => {
        const _prev = [...prevTableData];
        _prev[selectedRow[0][0]] = {...data};
        return _prev;
      })
    } else {
      // Add a new row to Handsontable
      setTableData(prevTableData => [...prevTableData, {...data}])
    }

    setSelectedRow(null);
    reset();
  }

  console.log(errors);

  return (
    <div className="mx-auto p-10">
      <h1 className="text-2xl font-bold my-4">React Hook Form + React Data Grid with Handsontable</h1>
      <form onSubmit={handleSubmit(onSubmit)}>

        <div className="flex items-center my-2">
          <label className="mr-2">{FIRST_NAME_TITLE}</label>
          <input
            className="border border-gray-300 rounded p-2"
            type="text"
            placeholder={FIRST_NAME_TITLE}
            {...register(FIRST_NAME_TITLE, {
              required: true,
              maxLength: 80
            })} />
        </div>

        <div className="flex items-center my-2">
          <label className="mr-2">{LAST_NAME_TITLE}</label>
          <input
            className="border border-gray-300 rounded p-2"
            type="text"
            placeholder={LAST_NAME_TITLE}
            {...register(LAST_NAME_TITLE, {
              required: true,
              maxLength: 100
            })} />
        </div>

        <div className="flex items-center my-2">
          <label className="mr-2">{EMAIL_TITLE}</label>
          <input
            className="border border-gray-300 rounded p-2"
            type="text"
            placeholder={EMAIL_TITLE}
            {...register(EMAIL_TITLE, {
              required: true,
              pattern: /^\S+@\S+$/i
            })} />
        </div>

        <div className="flex items-center my-2">
          <label className="mr-2">{MOBILE_NUMBER_TITLE}</label>
          <input
            className="border border-gray-300 rounded p-2"
            type="tel"
            placeholder={MOBILE_NUMBER_TITLE}
            {...register(MOBILE_NUMBER_TITLE, {
              required: true,
              pattern: {
                value: /^[+()\s-]*([0-9][()\s-]*){6,20}$/,
              },
            })} />
        </div>

        <div className="flex items-center my-2">
          <label className="mr-2">{SKILLS_TITLE}</label>
          <select
            className="border border-gray-300 rounded p-2"
            {...register(SKILLS_TITLE, { required: true })}
          >
            <option value={SKILLS_OPTION_FRONTEND_VALUE}>
              {SKILLS_OPTION_FRONTEND_VALUE}
            </option>
            <option value={SKILLS_OPTION_BACKEND_VALUE}>
              {SKILLS_OPTION_BACKEND_VALUE}
            </option>
            <option value={SKILLS_OPTION_FULLSTACK_VALUE}>
              {SKILLS_OPTION_FULLSTACK_VALUE}
            </option>
          </select>
        </div>

        <div className="flex items-center my-2">
          <label className="mr-2">{DEVELOPER_TITLE}</label>
          <label className="mr-2">
            <input
              {...register(DEVELOPER_TITLE, { required: true })}
              type="radio"
              value={DEVELOPER_OPTION_YES_VALUE} />
              {` ${DEVELOPER_OPTION_YES_VALUE}`}
          </label>
          <label className="mr-2">
            <input
              {...register(DEVELOPER_TITLE, { required: true })}
              type="radio"
              value={DEVELOPER_OPTION_NO_VALUE} />
              {` ${DEVELOPER_OPTION_NO_VALUE}`}
          </label>
        </div>

        <button className="bg-blue-500 hover:bg-blue-700 text-white font-bold py-2 px-4 rounded my-2" type="submit">
          {SUBMIT_BUTTON_TITLE}
        </button>
      </form>

      {/* Handsontable container */}
      <HotTable
        ref={hotRef}
        settings={hotSettings}
        outsideClickDeselects={false}
        manualColumnResize={true}
        licenseKey="non-commercial-and-evaluation"
      />
    </div>
  );
}
App.css
.handsontable td {
  padding: 4px;
}

.handsontable td button {
  display: block;
  margin: auto;
}
The output will look like this:
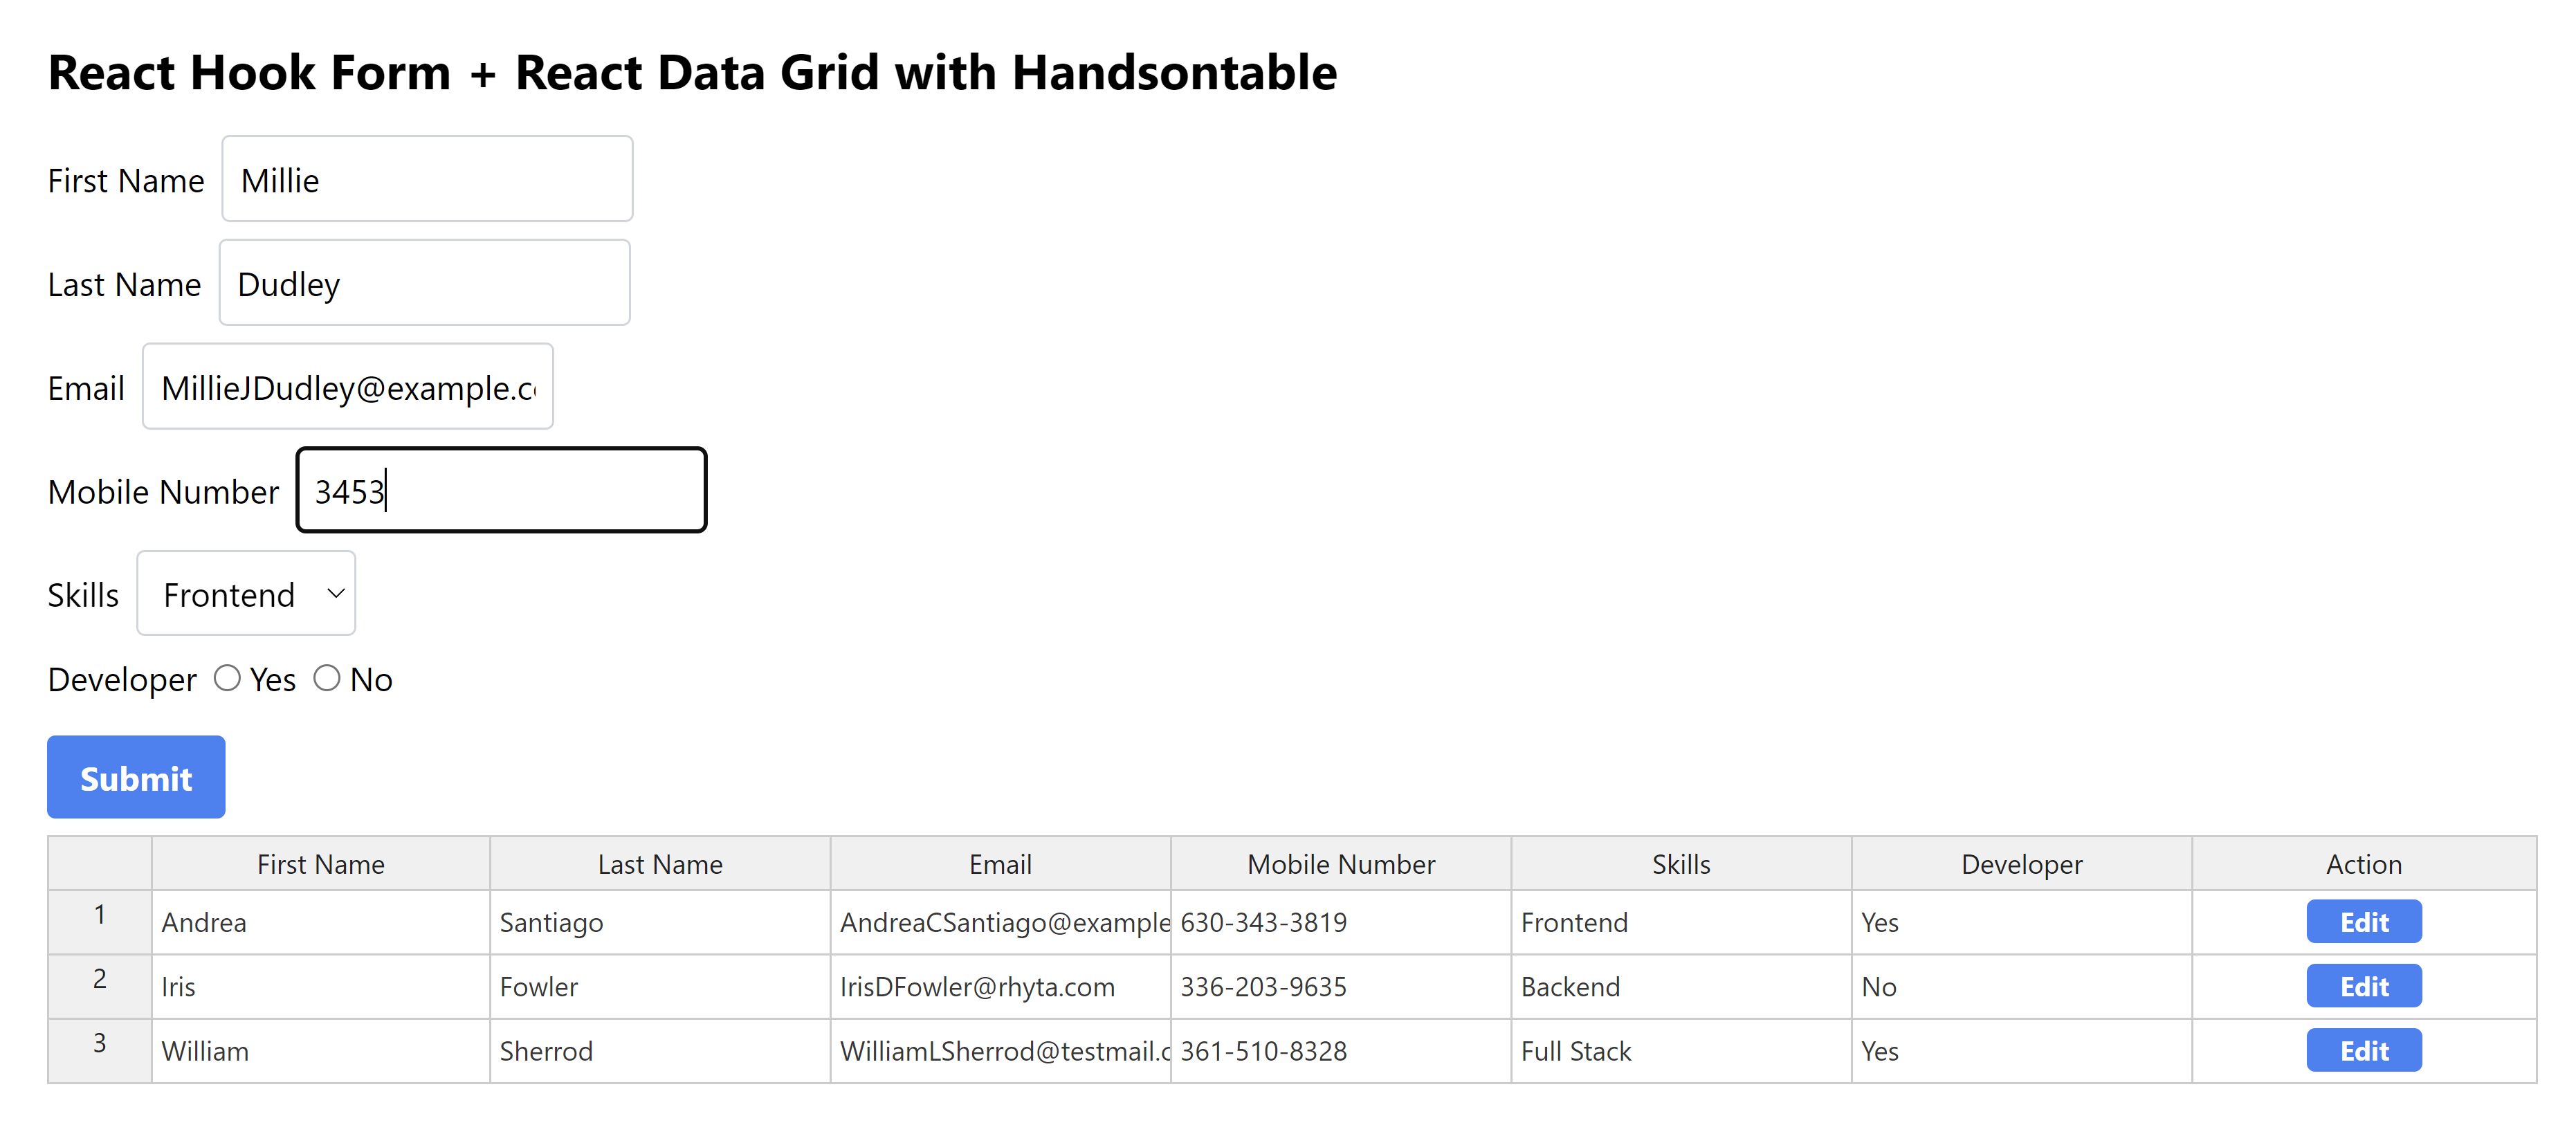
You can edit the record by clicking the Edit button in the Action column.
Conclusion
The aim of this article was to provide you with ready-made integration of Handsontable data grid and React Hook Form, enabling easy implementation in your own project. In future articles, we’ll introduce more useful functionalities using a hands-on approach.
You might also be interested in our article demonstrating how to quickly build a public ledger to track your company’s expenses with React and Handsontable. Take a look!
Akash Mittal
A software developer and content creator with a passion for animals 🐈⬛